
Project progress
Where it stands.
- ✓Finalized the approximately 4 × 7 ft footprint
- ✓Finalized the approximately 22 in raised-wall direction
- ✓Selected the liner and underlayment
- ✓Finalized the general pond placement within the enclosure
- ✓Decided to support the entire structural footprint
- ✓Decided to reuse the existing Pond Boss filtration initially
- ○Remove the rose bushes and prepare the site
- ○Level and compact the footprint
- ○Install the paver-supported base
- ○Build and brace the wooden frame
- ○Complete final excavation and depth shaping
- ○Install the underlayment and liner
- ○Fill and perform structural and leak tests
- ○Install filtration and fountain
- ○Build turtle ramp and access
- ○Install trim and surrounding finishes
- ○Move the turtles into the finished pond
Next taskFinalize the remaining structural details and material quantities, then begin clearing and preparing the pond footprint while protecting the existing turtle nesting area.
The basics
Project details
- Current pond
- Approximately 40–50 gallons
- Planned footprint
- Approximately 4 ft × 7 ft
- Estimated capacity
- Roughly 350–400 gallons
- Raised wall
- Approximately 22 in
- Target water depth
- Roughly 2 ft or slightly more in portions
- Build style
- Heavily braced sleeper-style wood frame
Goal
What I was trying to do.
The biggest reason for this project is to replace a roughly 40–50 gallon temporary stock tank with a roughly 350–400 gallon permanent habitat for three adult turtles. That means dramatically more swimming room, greater usable depth, better filtration, and easier water-quality management. It also leaves room to add aquatic plants, feeder fish, and hiding areas later. I want it to look like a permanent part of the enclosure, but I do not want to build another intermediate upgrade and replace it again. The plan is to build it big enough now and do it once.
Planning
The plan.
The approximately 4 × 7 ft pond will sit almost the full width of the enclosure, hugging the front fence, the back house-side boundary, and the left-side fence. Most of the remaining usable land will stay on the right near the existing basking box and nesting area. The basking box stays and will connect to the pond with a small ramp; no large internal basking dock is planned. The walls will rise approximately 22 in, with the water relatively close to the top. Roughly 2 ft or slightly more of usable depth should be possible in portions of the pond by combining the raised structure with the existing stock-tank excavation. I do not plan to excavate the entire footprint 2 ft below grade.
Planned build and video
How I plan to build and document it.
- 01Document the existing setup from multiple angles.
- 02Identify and protect the existing turtle nesting and egg area.
- 03Remove the vegetation and two established rose bushes in the pond footprint.
- 04Remove or relocate the existing stock-tank pond.
- 05Prepare and compact the entire base.
- 06Establish full paver support beneath the wooden structure and verify that it is level.
- 07Build and connect the pressure-treated pond frame with strong corners and intermediate reinforcement along the 7 ft walls.
- 08Complete only the excavation needed for the final depth profile, reusing the stock-tank hole where practical.
- 09Install the 8 oz nonwoven geotextile underlayment.
- 10Install the 20-mil HDPE liner, protecting corners, folds, edges, transitions, and other pressure points.
- 11Fill gradually while checking the frame, liner, and base for movement or leaks.
- 12Install the Pond Boss pump, filter, and sprinkler or fountain head. A waterfall is not part of the initial V2 build.
- 13Build the small ramp between the pond and the land and basking area.
- 14Install the top cap, trim, and other finish details.
- 15Keep the pond bottom relatively simple and liner-safe, then add optional plants or natural rock where useful.
- 16Move the turtles into the finished habitat.
- 17Photograph and record the completed pond from the same angle as the original before view.
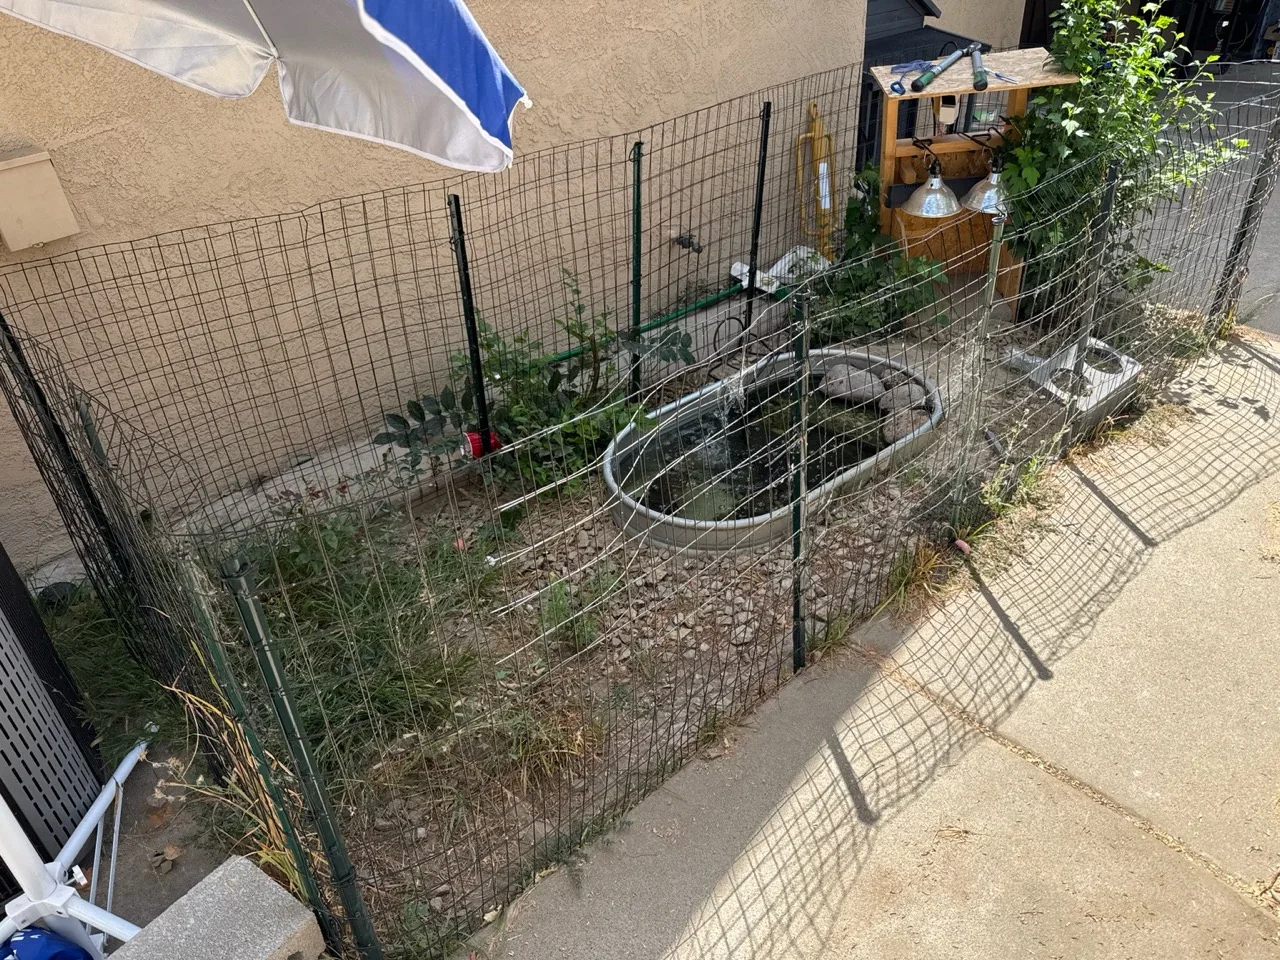
The current enclosure and stock-tank pond before the V2 upgrade.
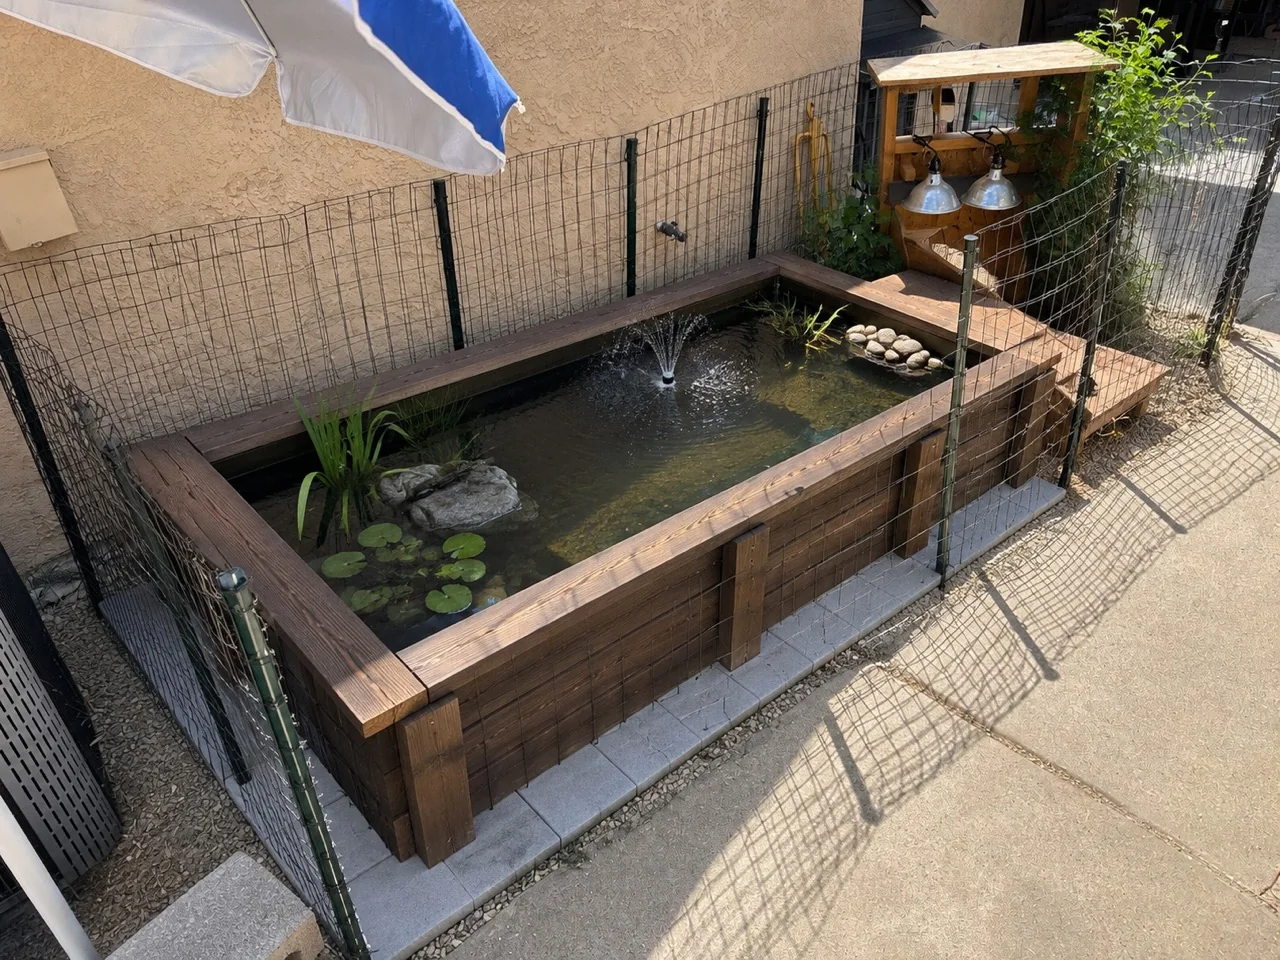
Concept mockup showing the general finished look and placement I am working toward. This is the plan, not the completed build.
Equipment already owned
- Pond Boss all-in-one pond pump and filter
- Pond Boss sprinkler and fountain-head attachment
- Zoo Med pond water heater
- Existing turtle basking box
- Existing enclosure and fencing
- Metal fence ties
- Existing river rock supply
Materials already purchased
- 15 ft × 20 ft, 20-mil HDPE pond liner
- 6 ft × 50 ft, 8 oz nonwoven geotextile underlayment
Planned construction materials
- Pressure-treated 2×8 lumber for the main wall structure
- Pressure-treated 2×6 lumber where needed for framing and bracing
- Pressure-treated 4×4 posts and supports
- Pavers beneath the entire wooden footprint so no sections float over dirt
- Compacted base material with sand or other leveling material where needed
- Strong corner reinforcement and intermediate support along the long walls
- Exterior structural fasteners suitable for pressure-treated lumber; final layout and quantity still to be verified
- Top cap and finish boards
What was difficult
The pond will hold several thousand pounds of water, with outward pressure concentrated along the 7 ft walls, so the frame needs more support than the minimum. It is also being built on prepared outdoor ground rather than a concrete slab. The entire footprint needs to be level, compacted, and supported instead of leaving sections floating over dirt. Heavy winter rain can leave roughly 1 in of standing water here, so drainage, wood durability, and elevated weather-protected electrical connections matter. The pond also needs to maximize water space while keeping land access near the basking box and preserving the nesting area. Reusing the stock-tank excavation adds depth without unnecessary digging, and the underlayment needs to protect the 20-mil liner at corners, folds, edges, transitions, and hard pressure points.
What changed
Earlier ideas used smaller pond dimensions, less structural support, different basking layouts, and more open land around the pond. The plan grew to approximately 4 × 7 ft because maximizing swimming room makes more sense for three adult turtles. It now uses approximately 22 in raised walls, support beneath the full structural footprint, the existing basking box with a smaller access ramp, and no large internal dock. I will reuse the Pond Boss filter and fountain, leave a waterfall for a possible later upgrade, and keep the bottom relatively simple and liner-safe.
Skills I used
What this one called for.
Along the way
Updates and lessons.
Support the entire pond frame
I first considered putting pavers only at selected structural points. That would leave parts of a heavily loaded wooden frame unsupported. With hundreds of gallons of water in the pond, the better plan is to prepare, level, compact, and support the entire footprint.
Water depth is more than wall height
The approximately 22 in raised wall does not limit the whole pond to 22 in of water. Reusing the stock-tank excavation lets portions reach roughly 2 ft or slightly more without digging the entire 4 × 7 ft footprint that deep.
Connected work
Other versions and related projects
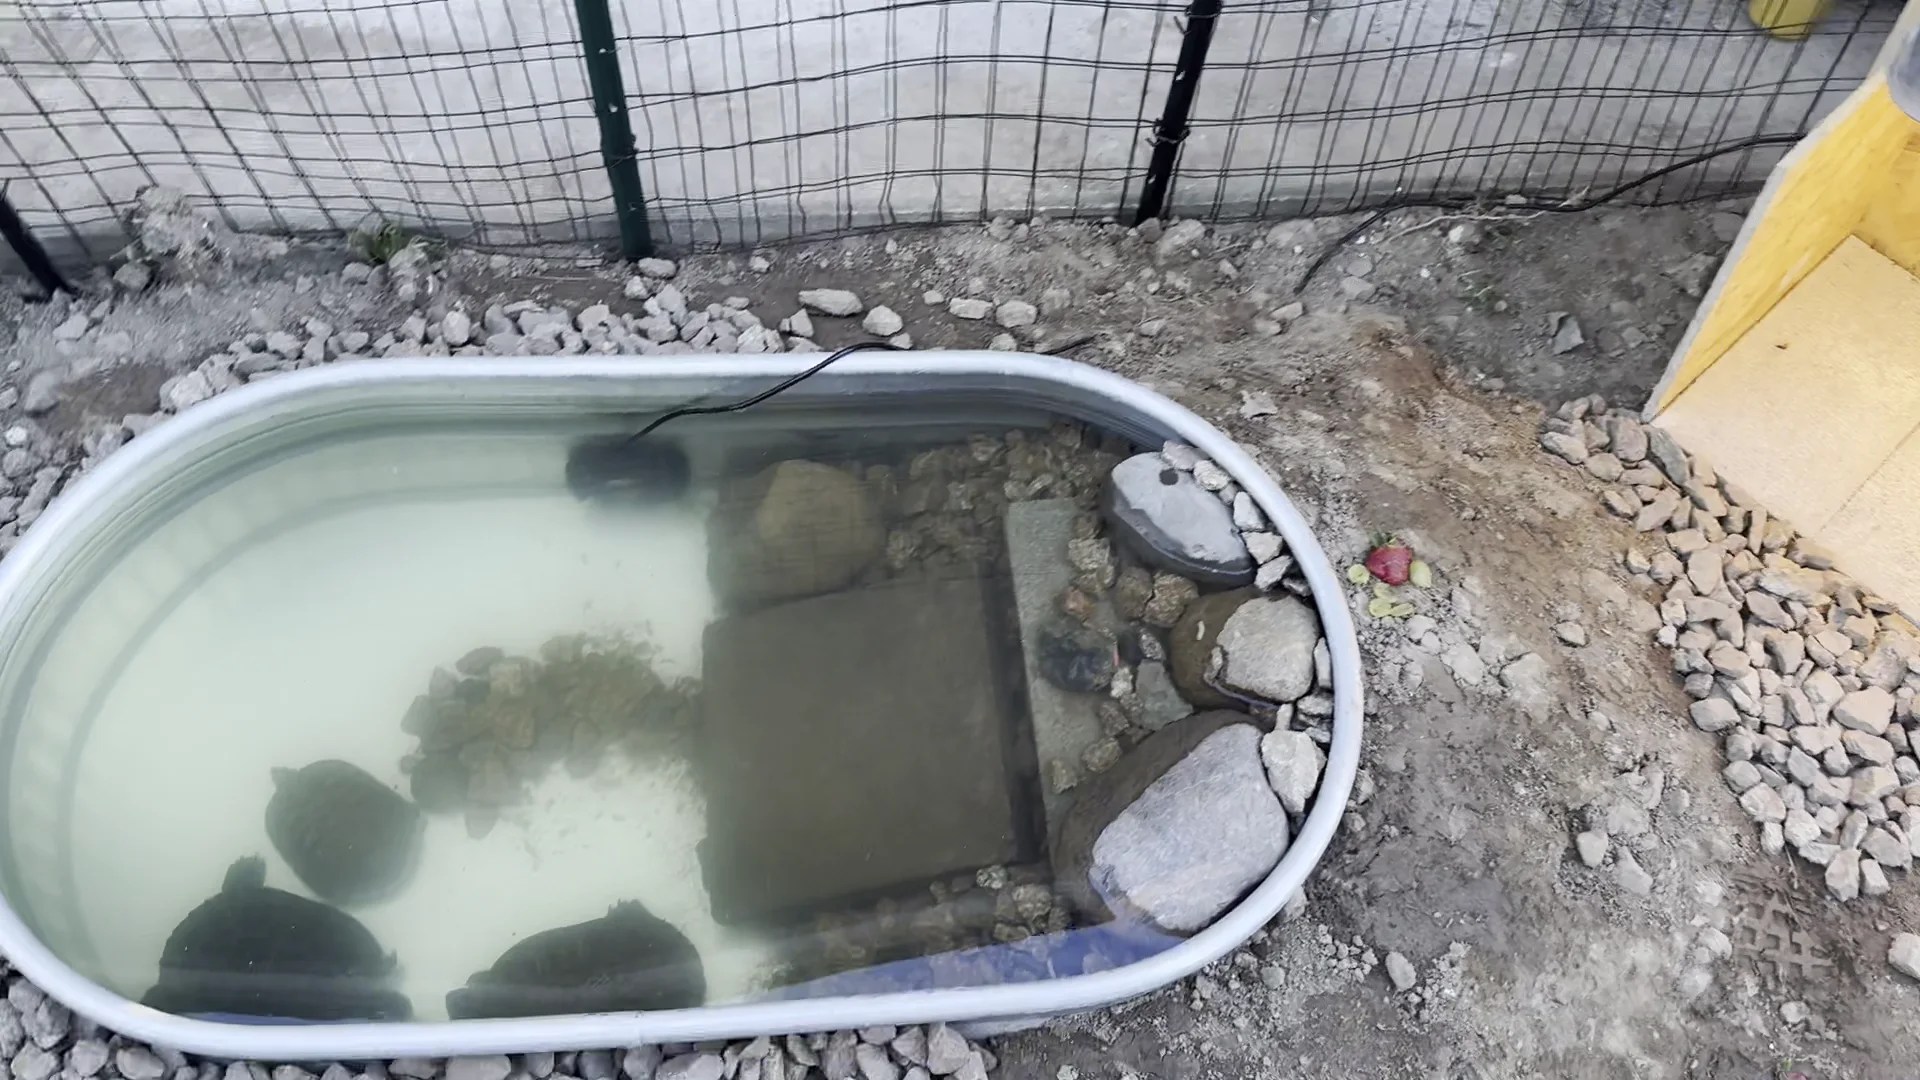 CompletedCurrently Documenting
DIY & Builds · Mar. 7–11, 2026
Building the First Outdoor Turtle Enclosure
I built this enclosure to give my three turtles more room to swim, bask, explore, and spend time outside. Version 1 started with a stock-tank pond, a homemade basking box, fencing, rocks, and a dirt area for moving around on land. I adjusted the ramp, fencing, and landscaping as I saw how the turtles used it.
Read the project →